How to setup TP-Link wireless CPE210 | CPE510 | CPE710 Outdoor devices.
TP-Link CPE210, CPE510, and CPE710 are cost-effective point-to-point and point-to-multipoint wireless outdoor connecting devices.
CPE210 supports 2.4GHz frequency and 300Mbps speed with 9 dBi gain but CPE510 and CPE710 support 5GHz frequency.

There are two parts of the configuration of TP-Link AP/CLIENT:
1: Access Point Configuration
2: Client or Station Configuration
Access Point configuration:
Step 1: The default IP address of the TP-Link AP device is 192.168.0.254. To access the device in the browser you have to set your computer IP address the same as 192.168.0.X.
For how to change the IP address of the computer click here.
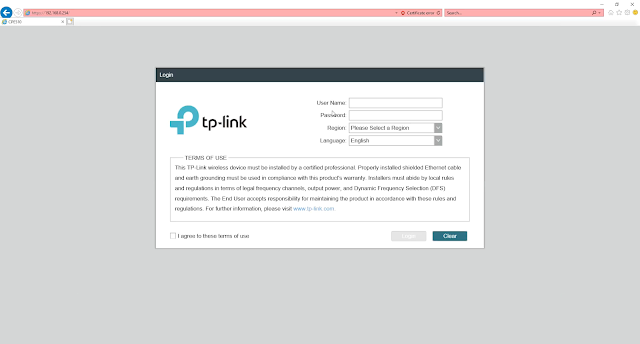
Step 2: Open any browser (Internet Explorer is good) type the default IP address 192.168.0.254 and click enter. and this login interface will open.
The default IP User Name and Password is admin, after selecting the Region you have to select
I agree to these terms of use.
After this click Login.
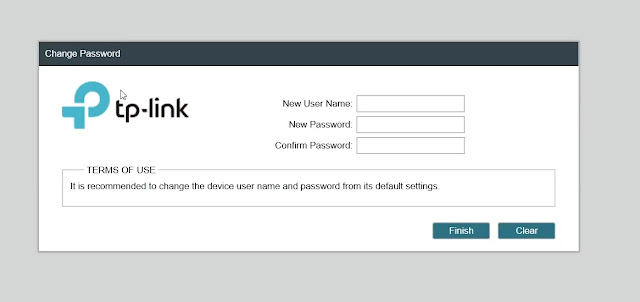
Step 3: The Next step is to change the login credentials for better security. Here you can choose your new username and password.
After entering the username and password you have to click finish.
Step 4: The next window has all settings and management buttons.
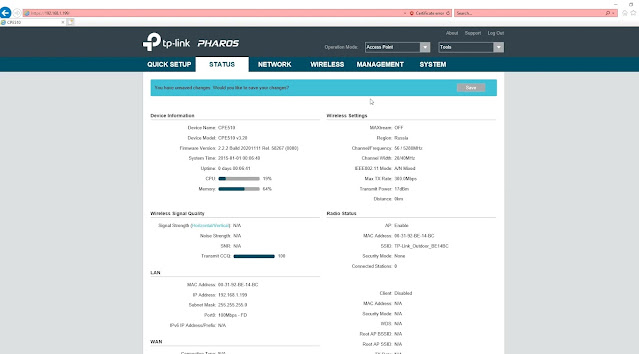
Step 5: The default operation mode is Access Point mode so first, we have to program access point mode.
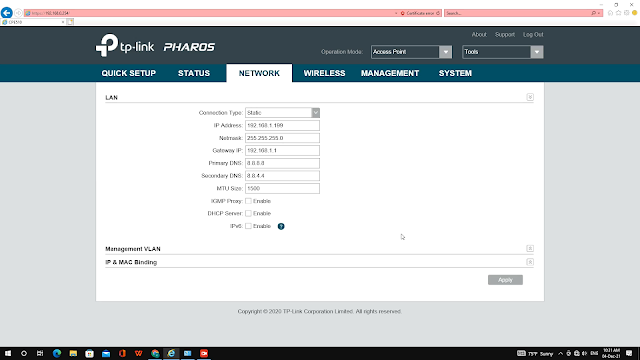
Now check the IP address of your network and change the network of the device same as your computer or your network.
- Change the SSID (Service Set Identifier) or Wireless network name for configuring the wireless section in the client configuration. and check Enable SSID broadcast.
- Choose the security mode to prevent a security breach or hack your network.
- Put PSK Password, and go with save.

Client or Station Configuration:


click to find the nearest access point SSID.


1 comment